Roof Replacement? Here’s How to Handle the Cleanup?
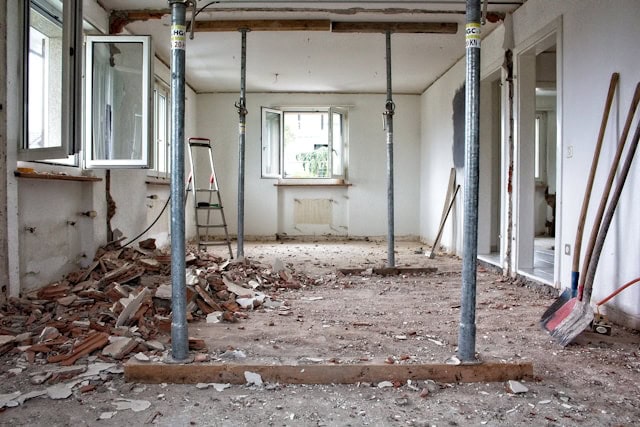
A roof replacement is a big deal. Once the shingles are replaced and the contractors have packed up, it might feel like the hard part is over—but the cleanup can be just as important. You’ve invested time and money into improving your home, so why let leftover debris ruin the experience?
Table of Contents
Why Cleanup Matters
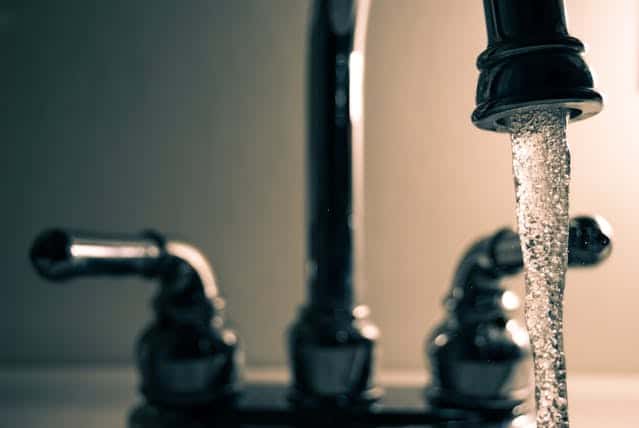
First, why should you care about post-roofing cleanup? It’s not just about keeping your yard looking nice. Roofing projects leave behind nails, old shingles, and scraps that can be a hazard. Picture this: you’re walking barefoot in your garden and step on a stray nail. Not ideal, right? Beyond safety, leftover materials can harm the environment and even damage lawn equipment. Proper cleanup with an affordable dumpster ensures your home is safe, tidy, and ready to enjoy.
What Does Roofing Debris Include?
Roofing debris isn’t just old shingles. It can include nails, underlayment, wood, and packaging from new materials. The variety of waste means you’ll need more than a broom to clean up. You’ll want to approach it with a plan, and luckily, we’re here to help with just that.
Step 1: Clear the Big Stuff First
Start with the most visible debris. Grab the large pieces of roofing material, broken shingles, and wood scraps. A good pair of work gloves is a must for this step. Toss these items into a pile for disposal later. Don’t forget to check your flower beds or any nooks where debris might have fallen during the replacement.
Step 2: Deal with the Nails
Nails are sneaky—they’re small, blend into grass and gravel, and can cause serious issues. Use a magnetic sweeper or a powerful magnet attached to a stick to collect stray nails efficiently. This tool is a lifesaver, especially if you have kids or pets who might be exploring the yard.
Step 3: Inspect the Gutters
Did you know your gutters could be full of roofing debris? Shingles and nails often find their way into these spaces during a replacement. Clean out your gutters carefully to prevent clogs and ensure your drainage system works properly the next time it rains.
Step 4: Rent a Dumpster for Proper Disposal
Roofing projects produce a surprising amount of waste. This is where a dumpster rental from wasteremovalusa.com becomes invaluable. Dumpsters are designed to handle heavy materials like shingles and wood, making disposal straightforward. Many rental services will drop off the dumpster, pick it up when you’re done, and handle disposal for you.
What to Look for in a Dumpster Rental:
- Size options – Choose a size that fits your project. A 10-20 yard dumpster is often ideal for roof cleanups.
- Weight limits – Shingles are heavier than you might expect, so ensure the rental covers the weight you need.
- Flexibility – Look for services offering flexible rental periods so you’re not rushed to finish.
Step 5: Final Sweep and Inspection
Once the big cleanup is done, go over the area one last time. Walk the perimeter of your house and check for anything you might have missed. This step also helps you spot any leftover nails or debris before they cause problems.
Pro Tips for a Hassle-Free Cleanup
- Protect your landscaping – Before the roofing begins, cover flower beds and shrubs with tarps to make cleanup easier.
- Get help – Don’t hesitate to involve friends, family, or a local cleanup service to speed things up.
- Recycle where possible – Some roofing materials, like metal flashing, can often be recycled instead of tossed out.
Avoiding Common Mistakes
Skipping the cleanup isn’t just lazy; it can have real consequences. Leftover nails can puncture tires or injure people. Debris in your gutters can lead to water damage. And leaving piles of waste on your property could result in fines if your area has strict disposal regulations. By addressing the cleanup promptly, you avoid these headaches entirely.
Why Dumpsters Are the Hero of Roofing Cleanups
If there’s one takeaway here, it’s that a dumpster rental simplifies the whole process. Instead of driving back and forth to a landfill, everything goes into one container. Plus, it keeps your property neat while you work on other parts of the cleanup. Dumpster rentals from Blue Box Waste Service and similar other entities tend to be affordable, convenient, and often eco-friendly since many companies separate recyclable materials for you.
Take Pride in Your Home
A roof replacement is a fresh start for your home. Taking the time to clean up properly ensures you can enjoy it fully, without worrying about hidden nails or an unsightly pile of debris in the corner of your yard. With the right tools, a bit of effort, and possibly a handy dumpster, the post-roofing cleanup can be quick and painless.
Your New Roof Deserves a Clean Slate
Cleaning up after a roof replacement might not be the most glamorous task, but it’s an essential part of protecting your investment. A tidy yard, safe surroundings, and properly disposed materials let you fully appreciate the hard work that went into your new roof. Take a moment to finish the project right, and you’ll enjoy the benefits for years to come.
Alan Roodey is a professional Author and contributor to many sites. He loves to write on various topics.